Organize products into categories
Group your products into categories and subcategories so customers can browse your store easily.
- 1
Create a category
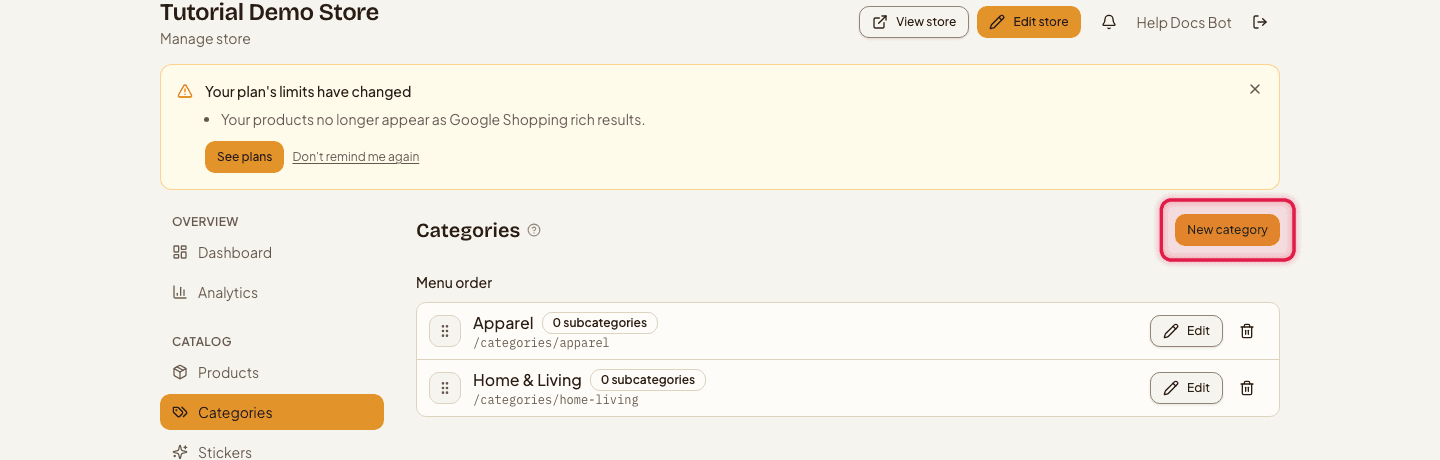
Go to Categories → New category and give it a Name.
- 2
Make it a subcategory (optional)
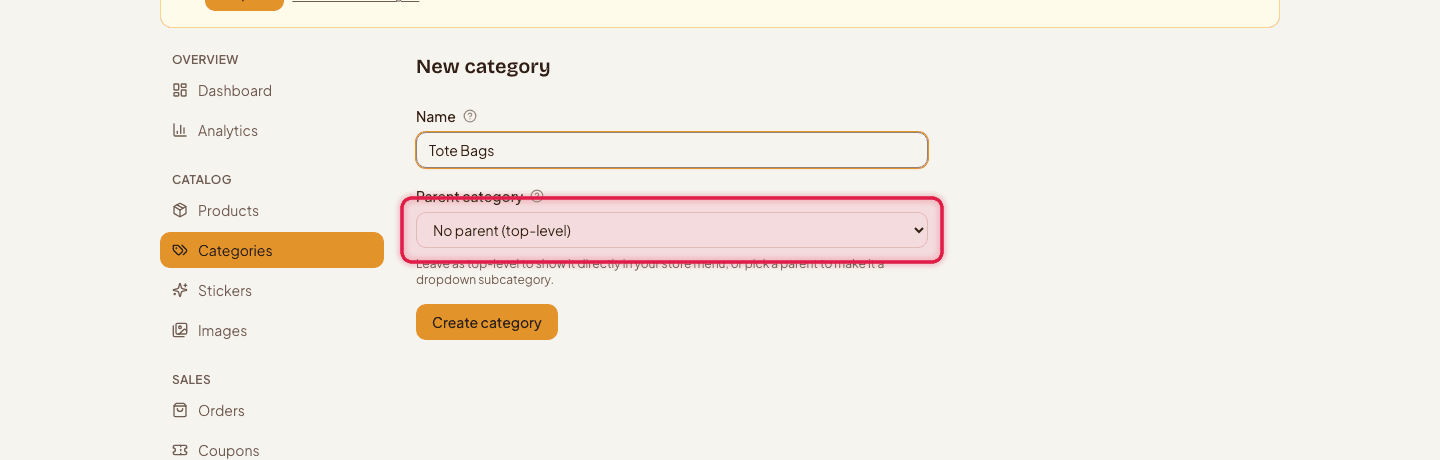
Pick a Parent category to nest it under — this turns it into a dropdown item in your store menu instead of a top-level entry.
- 3
Assign products
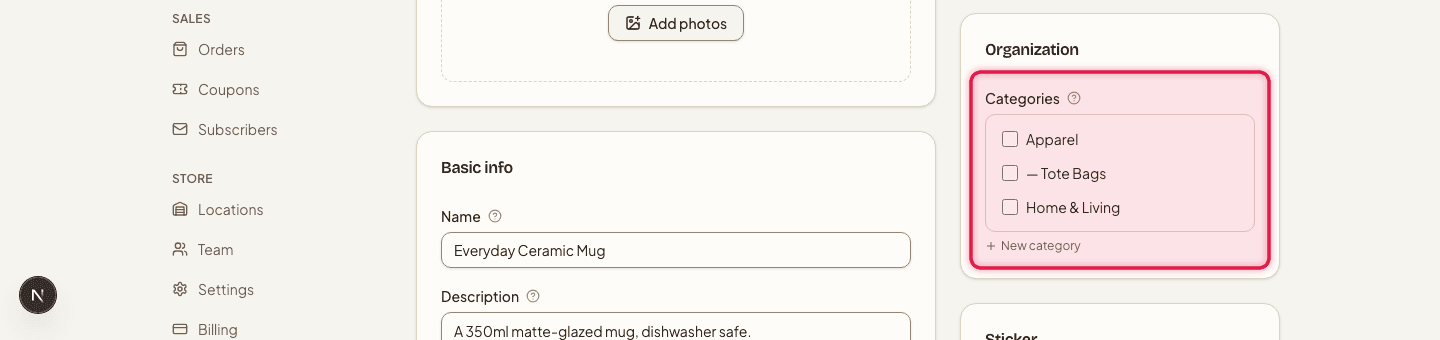
Open a product and choose which categories it belongs to — a product can be in more than one.
- 4
Reorder categories
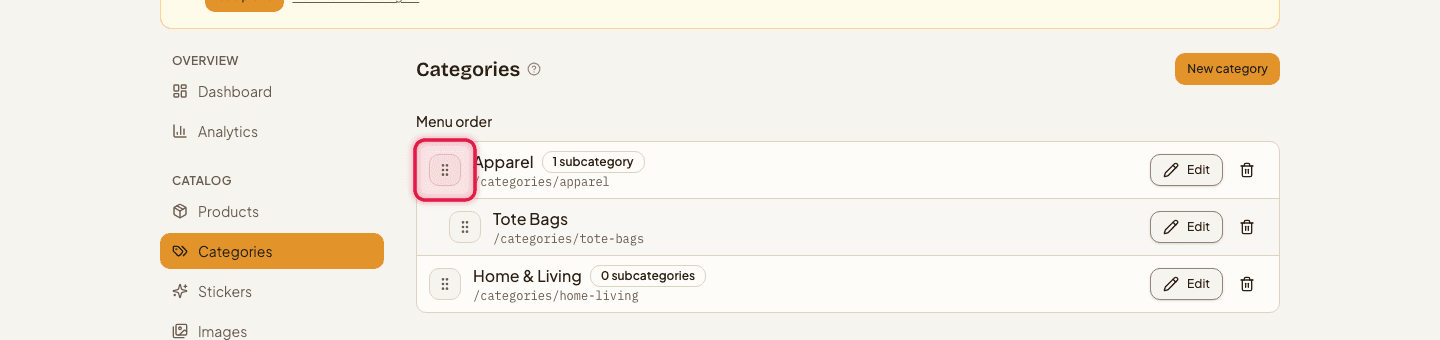
Drag categories up or down on the Categories page to change the order they appear in your store menu.
Deleting a parent category asks whether to delete its subcategories along with it — make sure that's what you want before confirming.
Category names can be translated per language if your store offers more than one language.
Still stuck?
Contact us and we'll help you sort it out.